 |
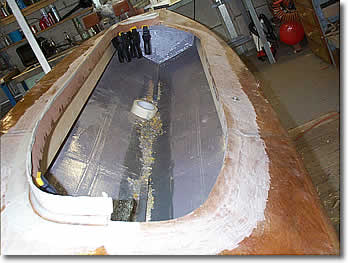
The rather
daunting first stage of the conversion, a big jagged hole in the
deck ! After a few minutes with the jigsaw, the kayak was much
lighter !
To the left,
you can see the first 3mm ply strip being epoxied to the deck
to create the new laminated coaming.
|
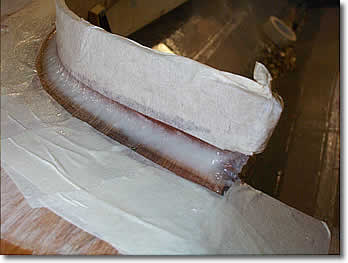 |
A
close-up showing the fillet of West Epoxy mixed with Colloidal Silica
to thicken it up. This will provide a nice faired edge to the coaming,
as well as adding strength to the joint. |
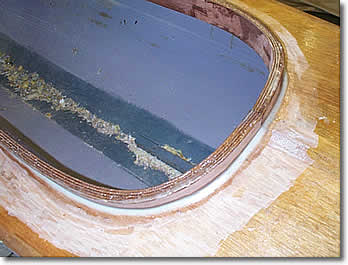 |
All
of the laminations now in place, creating a very strong 18mm thick
coaming. |
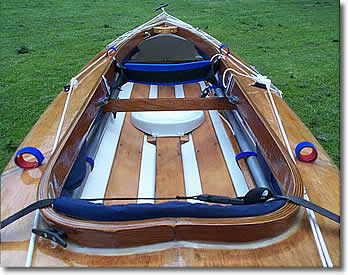 |
After planing,
sanding and varnishing, it's all looking neat and tidy again.
|
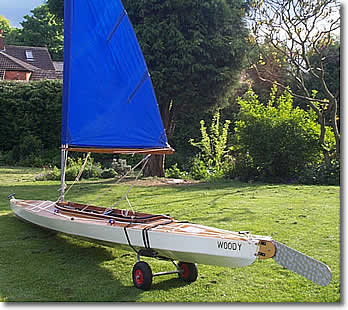 |
The sail rig
came from an old (beyond repair) puffin dinghy.
The 30sq ft
unstayed bermuda with two part mast was ideal, with a fairly low
centre of effort, and all spars could be stored within the kayak.
The only slight drawback was that being sleeved, it could not
be reefed.
|
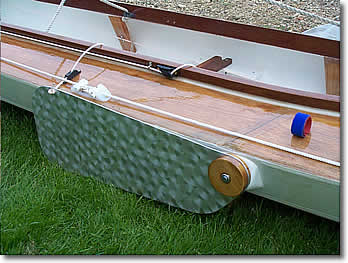 |
I fitted one
leeboard to a rigid pivot carved from a wooden block and faired
into the side above the waterline.
The simple
aluminium plate just swiveled down, and could be held up with
the lanyard and jamb cleat.
|
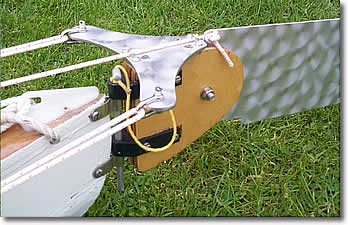 |
The lifting
rudder was similarly made from a sheet of aluminium plate, swiveling
in a wooden stock.
The control
and lifting lines were led forward to the cockpit (front seat).
|
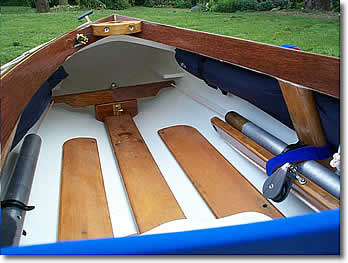 |
The foot operated
rudder bar could be moved along the central, fixed bottom board,
to enable steering from the forward seat, or central seat, when
solo. The swivel 'gripped' the sides of the board and was locked
in place with a brass bolt.
Also visible
in this picture are the stowed spars and the longitudinal buoyancy
bags, up under the deck. (I had also fitted watertight bulkheads
under the fore and aft decks, for buoyancy).To the right can be
seen one of the fore under-deck struts, which I fitted to stiffen
everything up after making the longer, single cockpit opening.
|
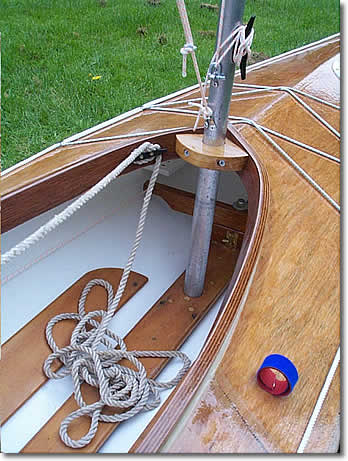 |
A block of
teak was carefully shaped to fit snugly in the apex at the front
of the cockpit coaming to step the mast, with the foot socketed
into the central bottom board (no stays).
The bottom
boards were spinkled with salt after the final coat of varnish,
which was than dissolved away after it had dried. (A nice tip
a dinghy sailor gave me for creating a cheap non-slip finish !)
|
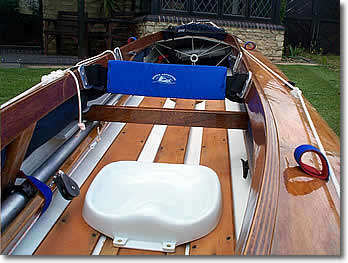 |
The original
fibreglass moulded seats were kept, and the front one was arranged
to slide along the centre bottom board to enable it to be placed
centrally for solo use.
Behind it
can be seen the footrest for the rear paddler, and the padded
backrest for the forward paddler, (with the second position brackets
behind).
|
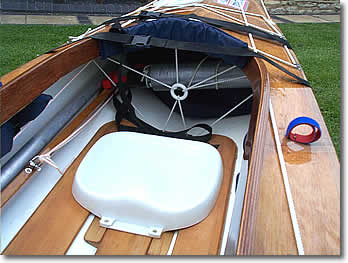 |
The aft seat
could also be moved for comfort.
The bungee
cords keep the rear stowage in place, and the bilge pump can also
be seen here.
The velco
loops on the deck hold the paddles when not in use, or sailing.
|
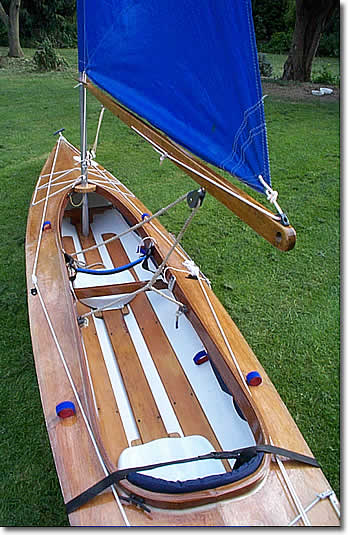 |
Here's the
overall view when rigged for sailing.
The sheet
is carried on an adjustable rope yoke threaded through eyes on
each coaming side.
The boom outhall
is lead forward to a small jamb cleat to enable control from the
forward seat.
The lanyard
kicking strap and downhaul are cleated to the base of the mast,
above the deck socket.
The leeboard,
(just visible on the starboard side) is pivoted just forward of
the centre of effort of the sail, so that with the effect of the
rudder, the centre of lateral resistence is just forward of the
centre of effort, so that she would turn into the wind 'hands
off'.
|
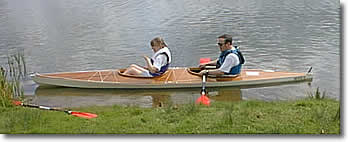 |
Unfortunately,
I didn't take many photos of Woody when she was afloat, (too busy
paddling or sailing !), here's one on Haversham Lake, Milton Keynes. |

